Our medical marketing clients who perform cosmetic surgery see a lot of action in their before and after photo galleries. Besides your homepage, the most visited page on your site is almost always going to be your photo gallery landing page.
So how do you provide the best possible experience to visitors who want to peruse your patient results? The first step is to have a well-organized gallery that’s stocked with up-to-date examples of your best work. Here’s 7 ways you can take the next step and make your patient photos really pop for the people who visit your site.
-
Choose the Right Device
 We’re not here to tell you the latest ratings on cameras or the biggest advances in smartphone image pixel sizes. But if you’ve been taking photos using the same digital camera for the past 10 years, it’s probably time for an upgrade. And you may not necessarily need a dedicated camera. If you are using one of the latest smartphones, you very well might be able to get some very high quality images out of it.
Test a few devices to see which one produces the clearest pictures with the most true-to-life colors, and then make sure that same device is always available when it’s time to take before and after images. In many cases, this availability concern makes it smart to invest in a dedicated camera you keep in one of your exam rooms or in an easily accessed common area such as the reception desk.
-
Use an Identical, Clean Backdrop
You can’t go wrong with a light-colored wall or drape as the background for your before and after patient images. What you really want to avoid is a busy background such as a wallpaper print. You also want to avoid having many different background colors. Set up an area in your office where before and after photos are taken, and stick with it every time. Very busy practices may want to have an area in each exam room with an identical background, so that pictures can easily be taken without waiting for a particular room to become available.
-
Get the Right Perspective
This can be a classic case of “easier said than done.” So you just want to take a front-on shot and a side shot of a patient. Seems simple enough, right? But even if you avoid the trickier three-quarters shot (which is actually a very nice way to illustrate breast case results in particular), it still helps immensely to have a patient’s “before” photos available to view as you are taking the “after” photos, so you can get the perspective just right.
For example, even if you are taking a front-on shot of a woman who had a tummy tuck, is the camera at the same height it was when you took the before image? If it’s too high or too low, it may look like the curve of the patient’s torso has changed more or less drastically than it really did.
Another consideration is how cases will look when grouped together on a landing page. If you use an identical angle each and every time, you’ll end up with a very polished and professional looking procedure landing page, rather than one with a mix of angles that looks like it has not been as well planned.
-
Pay Attention to Lighting
 Natural lighting can be great for crafting beautiful photos, but it’s actually not the best idea for before and after images. The angle and amount of light in a room is going to vary throughout the day and based on the weather, which is going to affect the consistency of your before and after photos.
So ideally you should set up your patient photos in a room that has no windows. A few tips can go a long way to improving how good your photos look. Remember that touching up your photos in any way, even to adjust the contrast or sharpness, is a big no-no, so that means you need to get the best possible image right from the start.
Overhead lights are almost universally unflattering. They’ll create shadows where you don’t want them. Still, they throw a lot of light and they may create a better image, especially if combined with some table or floor lamps, as compared to relying more heavily on the camera flash. Try a variety of lighting options with a staff member standing in for the patient to determine what produces the most lifelike and attractive result.
Keep in mind that different procedures may need different lighting. In this case, a quick cheat sheet on lighting setup can help your staff to make sure they get the lighting right each and every time. And if you are really planning to crank out a lot of patient photos, it might be a smart idea to invest in a studio-quality lighting kit (you know, the umbrella-looking things).
-
Scale and Size the Image Smartly
For the scale of your image, generally speaking, the bigger the better (our gallery system automatically scales images and allows for images up to 2MB in size, which is bigger than you’ll ever get with a standard digital camera). If you scale down an image on your own before uploading it, make sure you aren’t reducing the image quality in the process.
When we say image size, what we’re talking about is the dimensions or crop. You want to make sure you crop the before image in the same way as the after image, and you want to make sure you are adequately showing all the work performed.
For example, if your patient had a breast lift and tummy tuck, you don’t want a before image that just shows the breasts to the belly button and an after image that shows the breasts to the thighs. A viewer won’t be able to compare the breasts side by side since the images will be two different sizes and they also won’t be able to get a good sense of the amount of correction from the abdominoplasty.
-
Watch for Identifying Details
 Be sensitive to anything that might divulge a patient’s identity in photos, including tattoos, unique jewelry, and even things like prominent existing scars or moles. Of course, if you are displaying a face photo, you should make sure that the patient understands that his or her image will be publicly accessible and identifiable on the web. We’ve seen some practices put black bars over the eyes of some facial patients, but in addition to looking a bit creepy, we still feel that this provides too much identifying detail without the patient explicitly acknowledging that his or her image will be posted on the web.
-
And Don’t Forget Those Descriptions!
Your high-quality photos will make a big positive impression on gallery viewers. But don’t forget that the people looking at your gallery want context. Here are just some of the questions going through the minds of viewers as they browse your gallery: Does this person weigh about what I weigh? How old is he? Did she have kids before her lipo procedure? Help them answer these questions and get a more realistic sense of what might be achievable in their own case by providing relevant details in a short description for every case you add to your gallery.
 We’re not here to tell you the latest ratings on cameras or the biggest advances in smartphone image pixel sizes. But if you’ve been taking photos using the same digital camera for the past 10 years, it’s probably time for an upgrade. And you may not necessarily need a dedicated camera. If you are using one of the latest smartphones, you very well might be able to get some very high quality images out of it.
 Natural lighting can be great for crafting beautiful photos, but it’s actually not the best idea for before and after images. The angle and amount of light in a room is going to vary throughout the day and based on the weather, which is going to affect the consistency of your before and after photos.
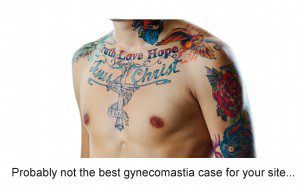 Be sensitive to anything that might divulge a patient’s identity in photos, including tattoos, unique jewelry, and even things like prominent existing scars or moles. Of course, if you are displaying a face photo, you should make sure that the patient understands that his or her image will be publicly accessible and identifiable on the web. We’ve seen some practices put black bars over the eyes of some facial patients, but in addition to looking a bit creepy, we still feel that this provides too much identifying detail without the patient explicitly acknowledging that his or her image will be posted on the web.